As promised many months ago, here’s the tutorial for another
flower stitch which is the variation to Flower Stitch 4.I’m sorry I didn’t
publish this post earlier.Nowadays I’m drifting far away from the internet
because I rather spend more time working outdoor.But, I love blogging and I’ve
so much to share with you that I decided to post once in a while when I’m free.
The difference between this stitch and Flower Stitch 4 is
that the petals of this flower slant to the right but the stitching is almost
the same as the previous one.
Divide a 3cm diameter
circle into 16.Bring up the needle at a point about two-thirds the radius of the
circle, between OA and OB.O is the midpoint, which I forgot to label here.Enter
at O, take a small stitch pointing towards B (about one-third radius), wrap the
thread under the needle and pull through.
Go in at B.Come up
between OB and OC(two-thirds radius) and pull the previously made stitch to the
left.
Go down at O, take a
small stitch, pointing towards C, wrap the thread under the needle and pull
through.
Go in at C and
continue the process.
Now, you’ll get an
idea on how it’s done.
For the last stitch,take a small stitch, pointing towards A, wrap the thread under the needle, slide the needle under the very first stitch and go down at A.
This is how the
flower looks like.
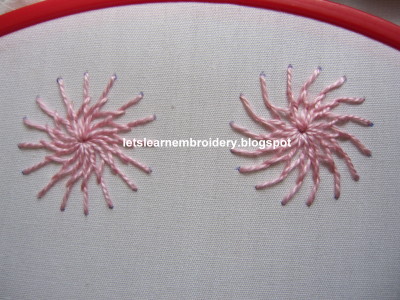
The comparison
between the two flowers.My favourite is the one on the right.I’m in the process
of preparing mirror/shisha tutorials for these two stitches.In my next post, I’ll
show you some examples of flowers that you can create out of these stitches.