ATTENTION YOUTUBERS, BLOGGERS

ATTENTION YOUTUBERS AND BLOGGERS :
YOU ARE NOT ALLOWED TO COPY THE TUTORIALS FROM THIS BLOG AND PRODUCE THEM AS YOUR OWN WHETHER ON PRINT OR ELECTRONIC MEDIA OR SHOW THEM ON YOUR BLOGS OR YOUTUBE CHANNELS.YOU ARE ALLOWED TO SHOW THE FINISHED WORK BUT PLEASE LINK BACK TO THIS BLOG FOR THE TUTORIALS.IF FOUND COPYING, I WILL REPORT YOU TO YOUTUBE AND ADSENSE.

Tuesday, November 29, 2011

Free ribbon embroidery pattern 1


After I published my last post, I realized that some computer viruses managed to creep into my PC and paralyzing the anti-virus.Since then, I’ve stopped surfing the internet and only occasionally log in into my BLOGGER account.My PC is now unprotected, so I haven’t decided whether to continue posting or wait till the problem is solved and since the anti-virus licence only expires in March, I am putting off calling the technician so that I won’t have to pay him twice.What I miss the most is visiting other blogs.I promise, I will catch up with you all after the problem has been fixed.
I would like to share with you a ribbon embroidery pattern that I’ve done.


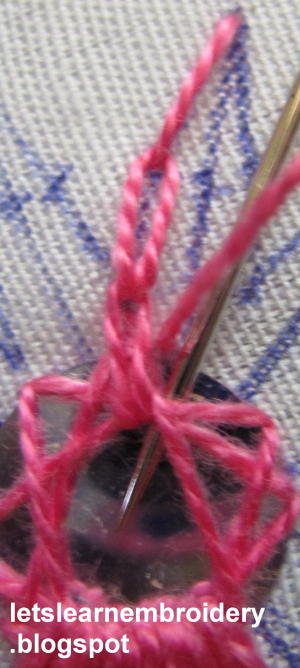
The basket is stitched using beads.Then, I made the spiderweb roses.The leaves are lazy daisy/detached chain stitches.Lastly, I made the 5-petal flowers.


This is the close-up of the basket.
To learn all the stitches and flowers, please go to Carol’s wonderful blog.Please click here for the link.
Happy stitching!

Tuesday, November 15, 2011

Kamal kadai leaf


I love anything that got to do with weaving.That’s why I love kamal kadai embroidery method.Although I’ve learnt this technique many years ago, only through Deepa’s blog that I found its name.She has given a tutorial on how to embroider kamal kadai flower.Lakshmi has also given a detailed explanation on this method and the threads used.Please click here for her link.
I’ve seen designs which use the same method for leaves, as well.But, since the flower made with this method has a flat tip, I feel it’s not suitable for a leaf.You could try the method shown below to embroider a kamal kadai leaf.

This leaf design is my own creation.You are not allowed to copy the tutorial and produce it as your own whether on print or electronic media, on your blog or youtube channels.You are allowed to show the finished work but please link back to this page for the tutorial.


This is the template of my leaf.


Bring out the needle at B.Pull through.Enter at D and come up at C.Wrap the thread under the needle and pull through.Enter at A (one fly stitch made).


Work another fly stitch connecting D, E, F, A.


The right side of the leaf is done in the same manner.


Embroider straight stitches  at AB, AF and the right side.


Starting from the base, start weaving the leaf.Use the needle to push down the thread as you weave and don’t pull the thread too tight.


Weave all the way to the tip, leaving the 4 pointed tips at the left and right.


Weave the pointed tips separately.This leaf is quite big.


I.ve made a smaller one, here.
If you’ve embroidered any designs based on kamal kadai technique, I would love to see them.Please give a description and leave the link to your post so that other readers could view them, as well.Happy stitching!

Thursday, November 10, 2011

Mirror work 2


I’ve created this mirror/shisha work out of flower stitch 2.

This mirrorwork is my own creation.You are not allowed to copy the tutorial and produce it as your own whether on print or electronic media, on your blog or youtube channels.You are allowed to show the finished work but please link back to this page for the tutorial.


Divide a 4cm diameter circle into 12.Transfer the 12 points onto the fabric.Draw straight lines connecting 2 opposite points and passing through the center.Draw more lines to form a star.Place the mirror (I’ve used a 1.25cm diameter mirror) in the middle and fix it with 4 straight and 4 diagonal stitches as shown (it is better to first fix the mirror with fabric glue).


These are the points on each petal.


Bring the needle up at the point shown (near A).


Bring the needle under the foundation stitch and pull through.


Bring the needle under the foundation stitch again but don’t pull through the needle yet.
Take a small stitch and bring the needle up at A and wrap the thread under the needle.


Pull through (it is important to use the same tension here, all around the mirror to produce beautiful, rounded center).


Go back into A and come up at B, wrap thread under the needle and pull through.


Enter at point C.


Come up at the point below D.Bring the needle under the foundation stitch.Pull through.


Go back under the foundation stitch.Without pulling through, take a small stitch and come up at D.Wrap the thred under the needle and pull through.


Repeat DE as in AB and enter fabric at C.


Continue in the same manner for the last part of the petal.


This is the stitch, done half-way.


The completed mirror work.


To learn how this is stitched without mirror, please click here.

Tuesday, November 1, 2011

Flower stitch 2


The flower made with this stitch is bigger compared to the previous one (Flower stitch ) but the method is almost the same.

This flower design is my own creation.You are not allowed to copy the tutorial and produce it as your own whether on print or electronic media, on your blog or youtube channels.You are allowed to show the finished work but please link back to this page for the tutorial.


Divide a 4cm diameter circle into 12.Transfer the 12 points onto the fabric.Draw a small circle in the middle of this circle (just big enough to fit in a sequin).draw straight lines connecting 2 opposite points and passing through the center of the circle.Draw more lines to form a star.


These are the points on each petal.


Bring up the needle at A.Pull through.Go back into A and bring the needle up at B.Wrap the thread under the needle and pull through.


Go back into B, come up at C, wrap thread under the needle and pull through.


Enter the fabric at D.


Repeat the same for AE à EF à FD.


This is the final part of the petal.


Continue in the same manner for the other petals.


Decorate the center with a sequin, stone or beads.


This stitch can also be done on a mirror.The tutorial is here.